Learn how do you make floating shelves on a budget so you don’t break the bank. This step-by-step guide will show you budget-friendly techniques to create beautiful floating shelves that will transform your space.
Are you looking to add a touch of elegance and functionality to your living space without draining your wallet? Look no further than floating shelves! These versatile and trendy shelves create an illusion of floating on the wall, adding a modern and minimalist aesthetic to any room.
The best part? You can make them yourself on a budget. In this comprehensive guide, we’ll show you how to create stunning floating shelves without breaking the bank. Get ready to unleash your creativity and transform your walls!
Contents
- 1 How Do You Make Floating Shelves On A Budget?
- 2 Can I Make Affordable Floating Shelves Without Professional Tools?
- 3 What Materials Can I Use to Make Low-Cost Floating Shelves?
- 4 Are There Any Cost-Effective Alternatives For Making Floating Shelves?
- 5 FAQs About How Do You Make Floating Shelves On A Budget
- 6 Conclusion on How Do You Make Floating Shelves On A Budget
How Do You Make Floating Shelves On A Budget?
If you’re looking to spruce up your living space without breaking the bank, then you’re in for a treat. Get ready to discover the secrets of creating stunning floating shelves on a budget. With a little imagination, some basic tools, and a touch of ingenuity, you can transform your walls into showcases of style and functionality.
In this comprehensive guide, we’ll show you how to bring the illusion of floating shelves to life without draining your wallet. Say goodbye to dull walls and hello to eye-catching displays. See how to below:
Planning and Preparation
Before diving into your DIY project, it’s essential to plan and prepare adequately. Here are the key steps to get started:
Gather Your Supplies
To create budget-friendly floating shelves, you’ll need the following supplies:
- Wood boards: Choose a type of wood that fits your budget, such as pine or plywood.
- Shelf brackets: Opt for affordable brackets that offer adequate support for your shelves.
- Screws and anchors: Select the appropriate screws and anchors based on your wall type.
- Sandpaper: Get different grits to smoothen and prepare the wood surface.
- Wood stain or paint: Decide on the finish you desire for your shelves.
- Measuring tape, level, and pencil: These tools are crucial for accurate measurements and proper installation.
- Safety goggles and gloves: Ensure your safety while working with tools and materials.
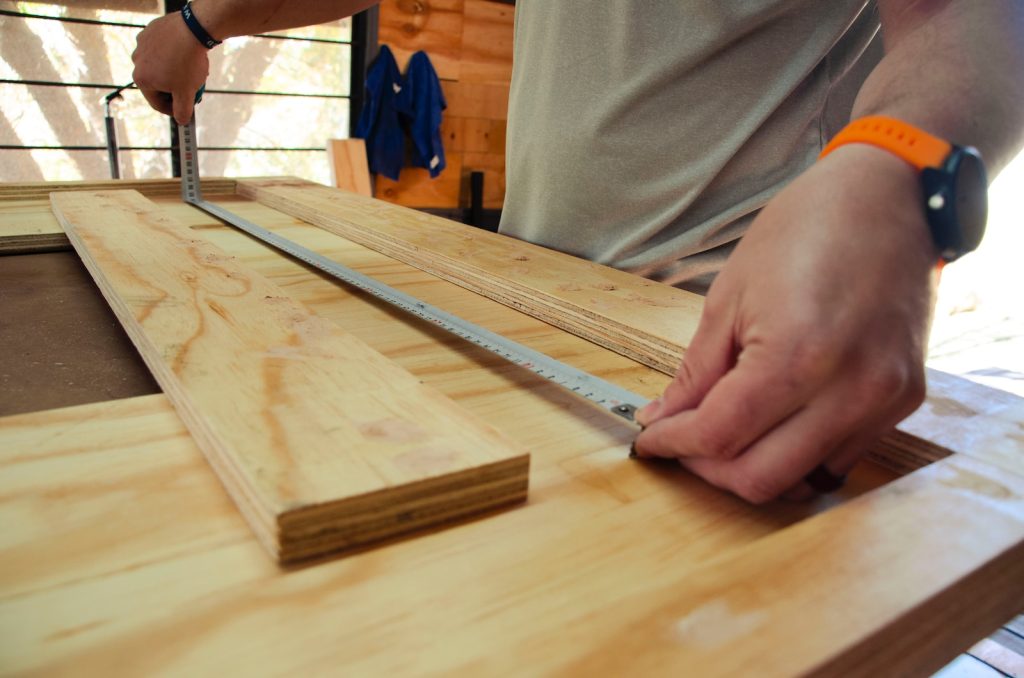
Measure and Mark
Before cutting your wood boards, measure and mark the desired length and width for your floating shelves. Use a measuring tape, level, and pencil to ensure precise measurements and straight lines. Consider the available wall space and the items you plan to display on the shelves when determining the dimensions.
Building the Shelves
Now that you’ve gathered your supplies and determined the dimensions, it’s time to build your floating shelves. Follow these steps:
Cut the Wood Boards
Using a saw or a circular saw, carefully cut the wood boards according to your measurements. Remember to wear safety goggles and gloves for protection. Take your time to ensure clean and accurate cuts.
Sand and Smooth the Edges
To achieve a polished look, use sandpaper to smoothen the edges of the wood boards. Start with a coarse grit sandpaper and gradually move to a finer grit to achieve a smooth finish. Sand in the direction of the wood grain to avoid any scratches or damage.
Apply Stain or Paint
This step is where you can get creative and add your personal touch to the floating shelves. Choose a wood stain or paint color that complements your existing decor or matches your desired aesthetic. Apply the stain or paint evenly using a brush or cloth, following the manufacturer’s instructions. Allow sufficient drying time between coats.
Can I Make Affordable Floating Shelves Without Professional Tools?
Creating affordable floating shelves doesn’t have to require fancy equipment or professional tools. With a bit of creativity and resourcefulness, you can achieve stunning results using simple tools commonly found in most households. Here are some tips to help you make affordable floating shelves without breaking the bank:
- Measure and plan: Start by determining the desired size and location of your floating shelves. Measure the wall space accurately to ensure a perfect fit.
- Choose the right material: Opt for cost-effective materials that are readily available and easy to work with. Some budget-friendly options include plywood, MDF (medium-density fiberboard), or even repurposed wooden planks.
- Cutting the shelves: Use a handheld circular saw or a jigsaw to cut the shelves to your desired dimensions. Make sure to follow all safety precautions and wear protective gear.
- Sanding and finishing: Smooth the edges and surfaces of the shelves using sandpaper. Apply a coat of primer and choose an affordable paint or stain to achieve the desired finish.
- Mounting the shelves: To achieve the floating effect, consider using concealed brackets or floating shelf hardware. These can be easily found at affordable prices in hardware stores or online.
By following these steps and using readily available tools, you can create stunning floating shelves without spending a fortune on professional equipment.
What Materials Can I Use to Make Low-Cost Floating Shelves?
When it comes to making low-cost floating shelves, there is a range of materials you can choose from, depending on your budget and desired aesthetic. Here are some affordable options that can help you achieve stylish floating shelves without breaking the bank:
- Plywood: Plywood is a versatile and cost-effective material widely used for DIY projects. It comes in various thicknesses and can be easily cut and shaped to create floating shelves.
- MDF (Medium-Density Fiberboard): MDF is a composite wood material made from recycled fibers and resin. It is smooth, durable, and less expensive than solid wood, making it an excellent choice for budget-friendly floating shelves.
- Repurposed wooden planks: If you’re looking for an eco-friendly and low-cost option, consider repurposing old wooden planks or pallets. With a bit of sanding and finishing, they can be transformed into rustic floating shelves.
- Laminated boards: Laminated boards offer an affordable alternative to solid wood. They come in a variety of finishes and can mimic the look of more expensive materials.
- Metal brackets: Instead of using concealed brackets or hardware, you can opt for metal brackets that add an industrial or minimalist touch to your floating shelves. These brackets are often affordable and readily available in hardware stores.
Remember to choose materials that are sturdy and suitable for the weight of the items you plan to display on your shelves. By being resourceful and creative, you can achieve stylish floating shelves without breaking your budget.
Are There Any Cost-Effective Alternatives For Making Floating Shelves?
If you’re looking for cost-effective alternatives for making floating shelves, there are several options that can help you achieve stylish and functional shelves without straining your budget. Here are some affordable alternatives to consider:
- Rope or leather straps: Instead of using traditional brackets or hardware, you can create a unique and budget-friendly look by using rope or leather straps to support your floating shelves. Simply secure the straps to the wall and attach them to the underside of the shelves. This alternative adds a rustic or bohemian touch to your shelves.
- Ledge-style shelves: Ledge-style shelves are an excellent cost-effective alternative to traditional floating shelves. These shelves consist of a simple horizontal plank attached directly to the wall, creating a ledge-like effect. They are easy to install and can be made from various materials such as wood or MDF.
- Crate shelves: Repurposing wooden crates can be a creative and inexpensive way to create floating shelves. Simply attach the crates securely to the wall, either vertically or horizontally, and use them as storage compartments or display areas. You can leave the crates as they are or paint them to match your desired aesthetic.
- Corner shelves: If you’re looking to maximize space and create a unique design element, consider installing floating corner shelves. These shelves fit seamlessly into the corners of your room, providing functional storage and adding visual interest. They can be made from plywood, MDF, or repurposed materials.
- Hanging shelves: Another cost-effective alternative is to create hanging shelves using ropes or chains. This DIY approach allows you to customize the length and height of each shelf while adding a touch of whimsy to your space.
Remember, when opting for cost-effective alternatives, it’s important to ensure that your chosen materials and installation methods provide adequate support and stability for the items you plan to display on your shelves.
FAQs About How Do You Make Floating Shelves On A Budget
Q: Can I use reclaimed wood for my floating shelves?
A: Absolutely! Reclaimed wood adds character and a rustic charm to your shelves. Just ensure it’s properly cleaned, sanded, and treated before installation.
Q: How much weight can floating shelves hold?
A: The weight capacity of your floating shelves depends on the quality of the brackets and the wall they are mounted on. Ensure you choose sturdy brackets and install them securely for optimal support.
Q: Can I make floating shelves without brackets?
A: Yes, there are alternative methods such as using hidden brackets or utilizing the strength of the wall studs to create a floating effect without visible supports.
Conclusion on How Do You Make Floating Shelves On A Budget
So, how do you make floating shelves on a budget? With a little creativity, planning, and some DIY skills, you can create stunning floating shelves on a budget. By following this step-by-step guide, you’ll be able to transform your walls and showcase your favorite items in style.
Remember to measure accurately, choose the right materials, and take your time during the construction process. Get ready to impress your guests and enjoy the satisfaction of a successful DIY project. Happy crafting!